Review - Vango Galli 3 Driveaway Awning
When we decided to take the van for a week to Cornwall, we also made the decision that it was time to finally bite the bullet and invest in a driveaway awning.


We had been to Camperjam and seen the benefits of even just a small awning. Our friends had taken a small driveaway Vango awning which we had used to store the car seats for the children during the festival as well as the pram and other items that would be regularly used but would require having to put away the rock and roll bed to get to the cupboards.
We decided that if we were to spend a week in the van with wo children, we would need the extra space for storage and to have somewhere we could sit as adults to speak in the evening whilst the children were asleep in the van. If the weather wasn’t so good or it was cooler in the evening, we had no option to sit outside so a driveaway awning seemed like the best option.
I spent weeks searching and reviewing the best driveaway awnings. We needed a larger sized awning as we felt it would be a good investment for the future use of our van with the children as the grew up. A smaller awning would soon be outgrown so the larger the better was our mantra.
After looking for some considerable time, I decided that either the Vango Galli 2 or Vango Galli 3 Low would be best to suit our needs. We decided the Vango Galli Compact was too small for us and that we needed the extra section the full version Galli offered.
I finally decided on the Galli 3 as I found the price difference between the 2 and 3 variants was so minimal that the extra features of the newest version seemed worth it. Plus, you never know when the manufacturers are going to stop making spares that fit the older variants so having a newer version just made sense.
I found that the Vango Galli 3 Low featured Vango's market leading Sentinel Pro 420D Polyester and new for the 2019 variant was the ColourLok™ Technology feature which claims to keep the colour of your awning for looking newer for longer avoiding eventual fade.
Having bought the Galli 3 Low on eBay at Jacksons Leisure, I immediately took it out into the garden to set it up and check there were no faults. Upon putting together and pumping up the AirBeams, I was immediately impressed with the structure and found it was ideal for anyone who wants a larger and more usable space from their awning.
We took the awning away to Cornwall a few days later for a week holiday. The weather was stunning so I was happy to be out in the sun on our arrival setting up the awning.
I was surprised to find that Vango had also included a rubber mallet inside the easy access wide-mouthed bag, along with a the AirBeam pump, some pretty strong looking pegs and very strong looking webbing strap style guylines for the front and rear of the awning to anchor it down in case of high winds. Set up of the awning itself is no different to any other Vango Airbeam awnings; peg out the corners, pump up the three Airbeams and work your way around pegging out the rest of the pegging points and guylines, it really couldn't be simpler and is achieved easily in around 20 minutes. The Galli 3 Low runs the length of the van so the awning's main footprint is alongside that of the van.
The AirBeams used as the main structure of the awning were pre-bent SuperBeams™ and took seconds to inflate. I could see that there was even an option to add in one or two inner tents to offer sleeping space if needed although this was not s feature we would need in Cornwall on this trip, it may be something we consider in future as the children grow up.


Then it was as simple as a few guyropes and pegs to tighten the awning and hold it in place, again no more than 5 minutes work.
We had also purchased as a bundle, the groundsheet for the awning and also the Vango carpet. I must say, the carpet made such a huge difference. It gave the awning a more homely feel and went some way to making it feel that bit warmer inside as well as more comfortable underfoot.


I was aware having read reviews that daylight has always been a strong point in Vango tents and it's just as good in the Gali 3 awning, with big, clear windows making it a lovely bright place to sit and chill out in all weathers. We chose to set the awning up with a table and chairs in the middle for us to eat together as a family and to host boards games in the evening. Even with this in the middle, I found that there was still plenty of floor space for the kids to play in.
When deciding on the Vango Galli 3, I found the front facing awning to be attractive as it is positioned the same way your camper van is facing which I thought would help to give us added privacy when camping alongside others as well as meaning that it could fit onto a smaller overall pitch size.
Being 6’3” tall, it was important to find an awning that was comfortable to stand in and wouldn’t require me to have to be bent forward the whole time. The Galli 3 Low offered a standing head height and is designed to attach to vehicles that are 180 - 210cm in height making it ideal for the T6.
Alongside this, it has clear plastic windows with privacy curtains which give the awning a light and airy feel.


The Kador length for the Galli was 248cm which meant that the area between the van and the awning itself was large enough to safely store our car seats out of the way in in the dry without taking up room in the awning itself.
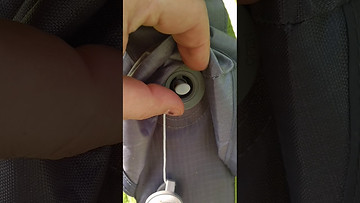
As I didn’t have an awning rail attached to the van at the time of the trip, I purchased a magnetic strip awning rail as an alternative for the trip. I had bought a permanent awning rail to fit under the pop top roof from Lightning Leisure but hadn’t managed to fit it in time for the trip. The magnetic strip did its job for this trip but I would be dubious as to its staying power in the rain or wind. It was quite loose and gave the impression it would fall from the roof if enough force was applied. However, we were lucky enough with our weather so it worked for us for the week.
Entry points are plenty for what is a good sized awning, with a main front door leading out onto a small canopy area which we found particularly nice to sit under in the midday sun but we found access into and out of the van easier through the two large zipped doors into the section between the van and the awning. It was just easier than having to walk around the awning and through the main door. However, this was more difficult with the magnetic strip awning rail as putting the slightest pressure on the zip to open the door alongside the van could cause the magnetic strip to slip and come away from the van. This feature will be far better once I have installed the solid awning rail onto the roof of the van.
This area between the van and awning doesn't have a groundsheet and is separated from the main awning area by a large zipped door making it ideal for storing mucky boots, bikes car seats and pushchairs in. We even used it for drying clothes on an airer which gives you an idea of the size available. You do however need to remember to move these items into the awning when detaching and taking the van out for the day as the items would essentially be left outside the erected awning you leave behind otherwise.
It was immediately apparent that the Vango AirBeam frame created a very strong and rigid structure. The awning came with the Vango AirBeam pump which is used to inflate the AirBeam. This process was so simple, just connect the pump to the valve on the beam and pup around 20 times and the beam was inflated. Remove the pump and lock the valve. It was extremely easy and took less than two minutes to inflate all four beams!

Deflation was just as easy. The Vango Galli 3 has double valves which mean to deflate, you just turn the valve to open and the beam deflates in seconds itself.
The whole unit fits easily into its large carry bag that fits perfectly on the floor in our van to take away on trips.
I had also heard that ventilation is also usually a strong point with Vango awnings and the Galli 3 demonstrates this with low level vents that can be propped open with a fabric opening on the outside and large high-level vents at the back of the living area to promote good air flow. Even in the boiling hot weather we had in August we found the awning cool inside which is a definite plus point.
If you're holidaying in a campervan or motorhome with the family, then having a decent awning is pretty much a given and having put the Galli 3 through a week of hard use we were glad we stuck with our gut feeling to go with a Vango. It has been one of our best purchases for the van so far and I have no idea how we would have coped without it for a week.
Vango themselves noted the below as the Galli 3’s key features:
- Vango AirBeam® Technology
- SuperBeams™ gives you a larger beam diameter
- Pre-angled beams
- Airspeed® valve and position
- Sentinel Pro 420D/106g/m² 6000mm polyester
- New ColourLok™ Technology
- UPF 50+
- TBS® II - Tension Band System
- Sewn-in Oxford Polyester groundsheet
- Fully taped seams
- Skylight windows
- SkyTrack II® System
- Large diamond clear PVC windows with zipped privacy curtains
- Mesh doors (Front & Side)
- AirZone Ventilation
- 248cm Side attachment
- x2 Connecting doors in tunnel
- Pre-attached 6mm Kador strip
- Cable entry points with tidies
- Low height for vehicles between 1.80 & 2.10 meters
- Rear porch rolls away when not in use
- Storm straps
- High visibility guylines
- Supplied with double action hand pump
- Supplied with steel pegs and mallet
- Oversized carry bagInner (Optional)
*Disclosure: Some of the Links we have placed in our Blog Posts are affiliate links, meaning, at no additional cost to you, we may earn a very small commission if you click through and make a purchase. We only ever share products that we have bought ourselves and would personally recommend as being quality products and at very competitive price. We are not sponsored to sell any products and self generate all of our recommendations based on products we have already purchased and want to share with you.